Friday, April 29, 2016

Workshop Cards W145, W146, W147

Here are some more cards we made at Joanne’s last workshop.


Workshop Card W145
Paper: Early Espresso, Crumb Cake, Black, White, Watermelon Wonder.
Ink: Early Espresso, Watermelon Wonder.
Accessories: Brick Wall EF, Hearth and Home Thinlits, Pearls, Tea Lace Doilies.
Punches: Itty Bitty Bits (flower).


W146 Friend
Stamps: Awesomely Artistic, Papallion Potpouri.
Paper: Sahara Sand, Bohemian DSP, Bermuda Bay, Old Olive.
Ink: Bermuda Bay, Old Olive.
Accessories: Sizzlits Lots of Tags, circle cutter, Neutral Candy Dots, Lacy Brocade EF.
Punches: Elegant Butterfly.


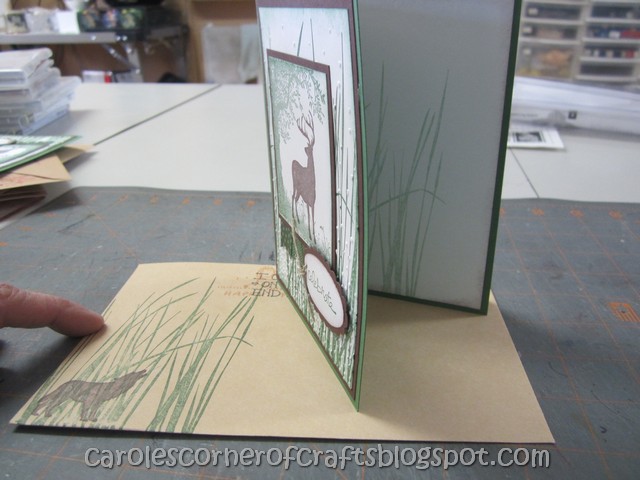
W147 Birthday Greetings
Stamps: Wetlands.
Paper: Soft Suede, Early Espresso, Crushed Curry, watercolor paper.
Ink: Early Espresso, Crushed Curry, Black.
Accessories: Early Espresso ribbon, Antique brads, mounts.
Punches: 1/8” circle.

Thank you for stopping by.  Both Joanne and I are SU! Demonstrators so if at any time you would like to purchase SU! products, give her a call or from my Blog, click on the Shop Now button.  Your order will be delivered right to you (you do have to give SU! a street address, not a box #).

Friday, April 22, 2016

Milestone Birthday – 10 years old - B10a


I’m going to make Shark punch art or maybe they are Whale punch art cards for my 10 year olds.  For my first one, I followed Blinkin',Thinkin', & Inkin' pattern on her blog.

Body – wide oval cut in half in Basic Gray.

Teeth – large oval punched then snipped with scissors in White.

Eyes – ¼” circle punch in Black, white gel pen highlight.

Lower fins – small oval cut in half.

Top Fin – 1-1/4” circle punch.  Punch again to get curves on both sides (put on a post it note so you can hold on to it).

Tail – Full heart – re-punched on both sides with a large oval (put on a post it note so you can hold on to it).

Sun punch – by Carl in Marina Mist.

Font for 10th – computer generated size 21 in Calibri.  Punched it out with the ½” circle punch.

Stamp – Party This Way with Black ink on Baja Breeze cardstock then punched out with the Word Window punch.  I used the Wish Big phrase from the Bring on the Cake stamp set for the inside.

The card is Baja Breeze.  I cut the Daffodil Delight with the Top Note die, sponged it in gray then put it through the Tim Holtz Rays EF.  I ripped a piece of Marina Mist, sponged it in gray and put it through the Swiss Dots EF.  Added a layer of glue then dipped it in Dazzling Diamonds to the ripped edge.

Tuesday, April 19, 2016

SU267 Celebrate


This card was made using all retired stamp sets.  Such a shame!  Notice the little Banner Blast tags?


Stamps: Inspired by Nature, Good Greetings, Banner Blast, Nature Silhouettes

Inks: Garden Green, Chocolate Chip.

Paper: Garden Green, Chocolate Chip, White.

Accessories: Hemp, Softly Falling EF, sponge, mounts.

Punch: large Oval, scallop oval, 1/8” circle, Banner.

Here is the inside and envelope.


Friday, April 15, 2016

One Hour Card Class - White on White Wedding Card OHCC005


Here is another card I found on Pinterest.  It is a hard one to photo since it is a white on white card!  It really is just gorgeous in person!

Stamp: Greetings Galore - retired (for the inside).

Ink: Basic Grey (for the inside).

Paper: Whisper White, White Mulberry (non SU!).

Accessories: Stampin’ Dimensionals, Bloomin’ Heart Thinlits die, Multipurpose Liquid Glue, sequins, white grosgrain ribbon, Pencil, Gently Falling EF.

Cut out a heart from Whisper White cardstock using the Bloomin’ Heart Thinlits.  I used a Cuttlebug to cut this.  My sandwich was as follows: A plate – C plate – die cut side up – wax paper – cardstock – B plate.  It cut beautifully with a few passes through the Cuttlebug!  


Cut 2 large flowers and 5 small flowers.  Curl the flowers by gently bending petals to the right side.  Set aside.


Place Stampin’ Dimensionals behind the 5 flower areas on the wrong side of the heart die.  Curl the edges of the heart die towards front.


Card base is Whisper White.  Cut a panel of Whisper White 3-3/4” x 5”.  Emboss with the Gently Falling embossing folder.  Cut ribbon at 15” long.  Tie around panel, about 1“from the bottom of panel and make a knot.  Add Stampin’ Dimensionals to the back of the panel.  Adhere to card front.

Adhered the flowers to the flower spaces.  Add a smaller flower on top of the larger ones.  Top each flower with a sequin using a small dot of Multipurpose Liquid Glue.


We made an envelope from white Mulberry paper – remember that incredible stuff?  5588


As one lady said, you need to work with layers, texture and dimension when working with a white on white card (or color on color).

Friday, April 8, 2016

Milestone Birthday – 9 years old – B09e


Here is my last Ladybug card.  This one was inspired by mychicnscratch.  I cut the Certainly Celery DSP 4 x 51/4” then scalloped the bottom. Here is the poem I used for this 9 year old card also from The Quote Garden.

They crawl out from warm mulch, just after snow,

In hidings from tunnels row after row;

They rest among dew drops and fly out to bring

Their red spots of colors to gardens of spring.

Happy 9th birthday!

Cardstock: Real Red, White, Certainly Celery, Black, Certainly Celery DSP.

Ink: Versamark,  Real Red, Black.

Stamp: Happiest Birthday Wishes, Memorable Moments.

Accessories: sponge, Swiss Dots EF, black EP, white gel pen.

Punches: 13/4” circle (1 black, 1 red), standard ¼” hole (2 dots), 3/16” crop-a-dile (dots), 1” circle (for #9, head), slot (antenna’s), 11/4” scallop circle, Scallop Edge Border.

Tuesday, April 5, 2016

SU265 Lucky Duck Baby Card


Stamps: Wagon Full of Fun, Greetings Galore (inside).

Paper: Bashful Blue, Black, watercolor paper, whisper white, Delicate Dots DSP.

Ink: black, So Saffron ink and re-inker, Bashful Blue marker, Tangerine Tango marker.

Accessories: Blender Pen, dimensionals, Bashful Blue grosgrain ribbon, Wink of Stella, sponge, buttons, aqua painter.

Punch: Scallop edge border, scallop oval, large oval,

Here is an oldie stamp set – from the 2009 Occasions Mini!

I started out by stamping the duck onto a scrap of Watercolor Paper then trimmed it to 2” wide x 2-3/4“ long.  I water colored the duck and used the markers and Blender Pen for his bow, beak and feet.  When it was dry. I sponged the edges.

I stamped the wing of the duck on a scrap Watercolor Paper and water colored it. When it dried, I cut it out and used the Wink of Stella in Clear and went over this wing, bow, beak and feet. 
The duck is layered on a 1/4″ bigger piece of blue DSP.  I cut the black panel about 3-1/4” wide by 2-7/8” long, scalloped one long edge and mounted my duck on this.  I believe I trimmed it down a bit more once I mounted my duck image.

My striped DSP was cut at 1-3/4” long by 5” and the yellow DSP was cut at 2” by 5”.  I fit this to my black panel cut at 5-1/4” by 4” and covered my join with a scallop border that was sponged.  I added the ribbon, duck image, buttons and phrase.

The wing was attached to the full image with a dimensional. 


Related Posts Plugin for WordPress, Blogger...